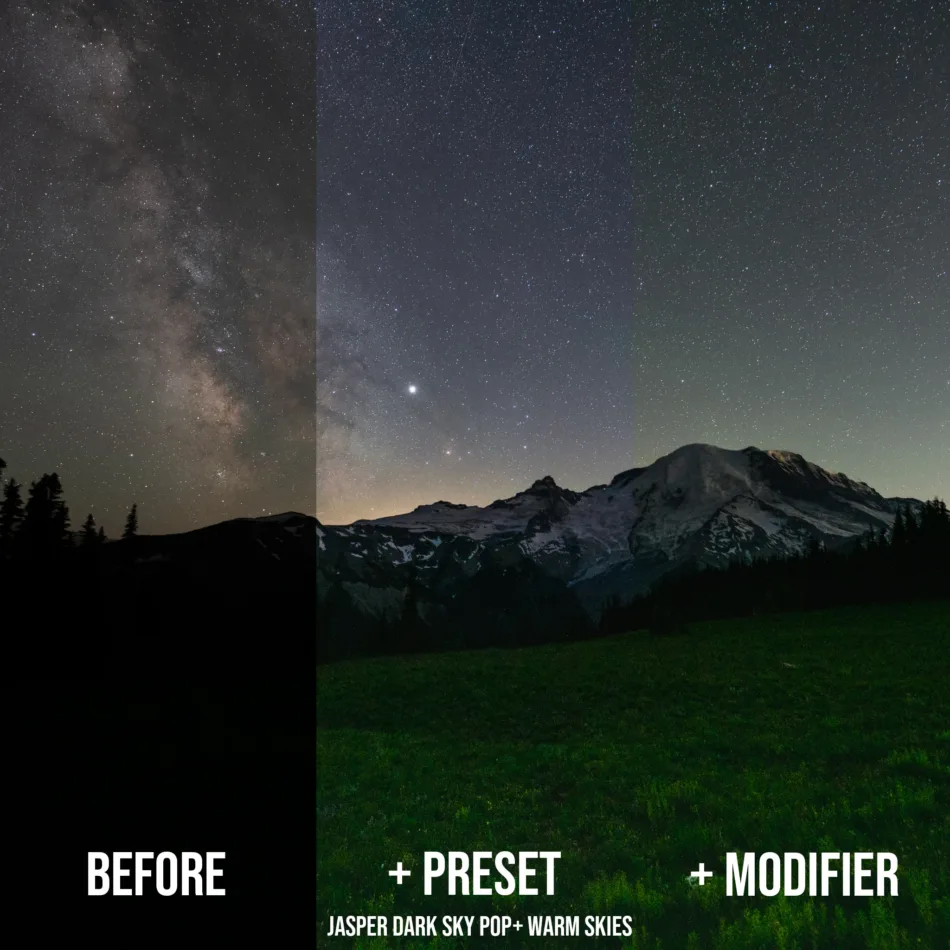
For as long as people roamed the face of Earth, they have been absorbed and engrossed by that huge canvas: our night sky. From the bright colors of the Milky Way to fine details in other galaxies, astrophotography gives us a way capture beautiful celestial objects. Post-processing can always add a little magic to your most beautiful hanging fruit, even when it comes in the shape of images.
This is where Adobe Lightroom comes in, as it a weapon that can turn your astrophotography shots into cosmic art. Whether you are an experienced astrophotographer or just getting started on your journey to the stars, mastering edits of Lightroom is so important in order to reveal the full potential hidden within them. This step-by-step guide will show you how to improve your astrophotography, reduce noise and add stunning visual effects.

Image Source : astrophotographypresets.com
Let this journey be an epic one that will help in enhancing your editing skills and along with all of these wonderous photographs of the universe you click on make it even more special. Well then, welcome to the cosmic realm!
Let’s start by knowing some Lightroom basics
Opening Screen Before you begin editing, it is essential that you familiarize yourself with Lightroom’s most simple tool bars. That powerful software is aimed at photographers, and it features the intuitive interface you would imagine as well as a vast array of tools to help with working on your images.
Key Features of Lightroom
Non-destructive Editing
The main attraction of Lightroom is its ability for non-destructive editing. What this means is that any changes you are doing to an image will not be saved on the original file. Instead, Lightroom saves your edits as metadata and you can go back until the beginning. For astrophotography, being able to make those fine adjustments can make the difference in your final image.
Organizational Tools
Lightroom is an awesome tool that offers strong organizational features, especially for managing your photos. You’re able to set up collections, add keywords or use flags and/or star rating for your images. This is particularly helpful if you have hundreds or even thousands of astrophotography shots from different nights, which helps quite a lot to find them later for editing or sharing.
Presets
One of the great things about Lightroom is that you can create and use presets (a predetermined set of editing adjustments for your image). On the brighter side, these presets can save you time and keep a consistent style throughout many of your photos. You can make your own presets according to the way you edit or download presets from other photographers. For astrophotographers, such a feature could be especially useful: noise reduction or color enhancements (for example) are sometimes something more than one image can benefit from.
The Interface
Knowing how to find the necessary tools and features when editing is paramount in using Lightroom. The main workspace is broken up into a number of panels:
- Library Module – This is where you import, so sorted and organize your photos. This way, you can easily find and select your images in grid or loupe view to send them for editing.
- Develop Module — This is where the real editing takes place you get access to all your adjustments and tools. Sliders to modify exposure, contrast, tone, color and more appear in the right panel.
- Toolbar – The toolbar is at the top of the screen, and it includes tool options that can be used such as cropping spots removal graduated filters.
Workflow
By knowing how a normal editing workflow goes in Lightroom, you can speed up your process to some extend. A proposed workflow might be like:
- Import Images: Start by importing your photos into Lightroom in the Library module.
- Organize Your Photos: Categorize your images using collections and keywords so you can quickly search for them.
- Initial Culling: Go through your photos and make selections to edit from the unedited bunch.
- Standard Fixes: Switch to the Develop Module, and process Basic Adjustments (exposure, contrast etc.).
- Other fine-tuning changes include removing the white background on her top to color adjustments and nose reduction.
- Local Adjustments: Apply graduated or radial filters to affect certain areas of your image.
- Exporting: Last but not the least, export your edited images in format and resolution of choice to share or print
With a good handle on these basic features and principles, you should be well set to edit your astrophotography images with confidence in Lightroom, converting your captures into beautiful visual tales of the night.

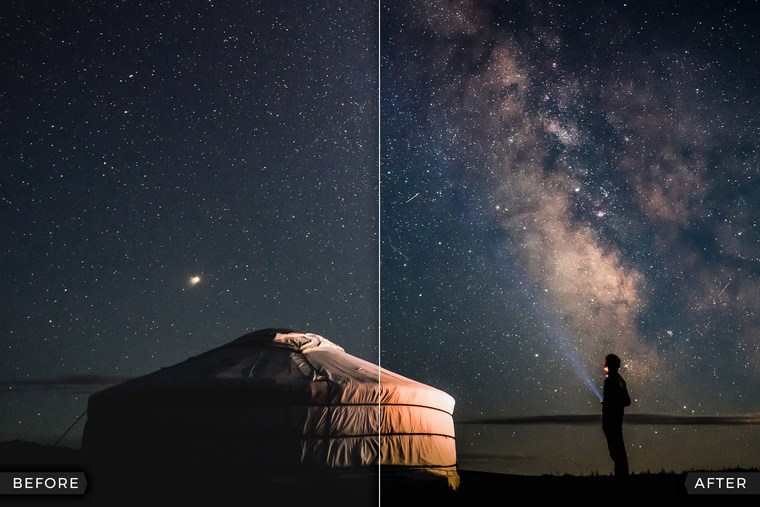
Image Source : northlandscapes.com
Step by Step Editing Process
With Lightroom in place and ready to roll, you are welcome for our step-by-step guide on how to edit your Astrophotography images.
1. Import Your Photos
Start by importing your RAW Astrophotography images in Lightroom. RAW files preserve more data, and therefore flexibility during editing.
2. Crop and Straighten
- Crop: Change the composition and crop out any element inside image which is a distraction.
- Straighten with the Straighten tool if your horizon isn’t straight.
3. Basic Adjustments
- Exposure: Begin by changing the exposure slider to increase or decrease image brightness.
- Contrast: Increase the contrast to make stars pop against the background.
4. Tone Adjustments
- Highlights: Lower the highlights to pull back information in areas with high gradation.
- Shadows: Lift inclusions of shadows to reveal additional detail present in the darker regions.
- Whites and Blacks: These are what you adjust to tweak where your dynamic range lies in between.
5. Enhance Colors
- White Balance: Getting the right white balance for an image so that it is more visually accurate by sliding your temperature or tint sliders.
- HSL Adjustments: With this, some of the major factors are Hue (through which you adjust individual color), Saturation (Originating to add particular colors more physical appearance) & Luminance (for generating lights).
6. Noise Reduction
- Luminance Noise Reduction: Raise this setting to reduce graininess that is often present in astrophotography.
- Color Noise Reduction: To reduce the color artifacts in your image.
7. Detail Enhancement
- Sharpen: Use a light touch while sharpening, emphasis on the edges of stars for sharpness.
- Masking: Hold the Alt key (Option on Mac) while adjusting the masking slider to sharpen only desired areas
8. Local Adjustments
Use the tools to enhance your imagery in certain aspects:
- Graduated Filter: Apply contrast to darken or lighten some parts of the sky for a balanced exposure.
- Radial Filter: Draw a circle around the important stuff such as the Milky Way and increase exposure or clarity.
9. Add Vignetting
A delicate vignette can bring focus to the center of your image, helping viewer eyes go right to celestial features.
10. Final Touches
- Spot Removal: Spot check by zooming in and see for any distractions / spots which needs to be cleaned up. Use the spot removal tool.
- Review and Refine: I took one last look at my image, made a few final tweaks for that extra polish.
Exporting Your Masterpiece
Export image once you have made all the edits Check out the options for what purpose you are using it :
- File Format: Select from JPEG (web suitable) or TIFF (high quality print).
- Dimensions and Resolution: Customize the size & resolution as per where are you going to show it.
- Output Sharpening: Use output sharpen based on if it is for print or screen.
Conclusion
Editing astrophotography images in Lightroom is not only to improve the visuals, but it combines into an artistic process which allows you display your own vision of the night sky. In this article you will learn how to take your captures and make them a visual masterpiece that evokes an emotional reaction from anyone who views it by following along with the step-by-step guide.
Don’t forget, do a lot more practice — try different technique and be the master! As is the universe, so too are your creative options. Happy editing!